DNS Service Configuration
1. Forward Lookup Zone Settings
NameServer (Linux)
apt install -y bind9
※ 방화벽이 있다면 네임서버로 가는 DNS 포트를 열어준다 (UDP/TCP 53)
vim /etc/bind/named.conf
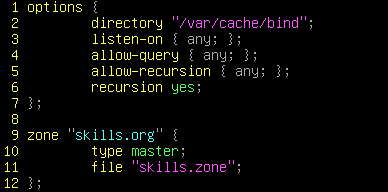
cp /var/cache/bind/db.0 /var/cache/bind/skills.zone
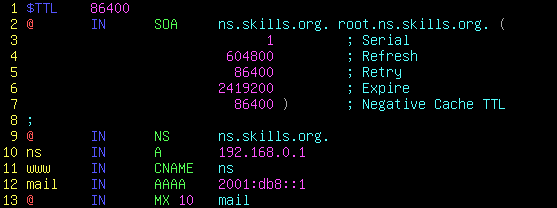
vim /var/cache/bind/skills.zone
chown bind:bind -R /var/cache/bind/
named-checkconf /etc/bind/named.conf
named-checkzone skills.org /var/cache/bind/skills.zone

※ 위와 같이 OK 가 출력이 돼야 한다
systemctl restart bind9
2. Reverse Lookup Zone Settings
NameServer (Linux)
apt install -y bind9
vim /etc/bind/named.conf
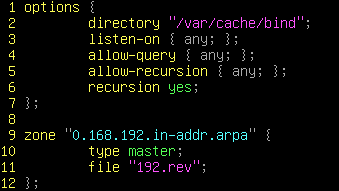
cp /var/cache/bind/db.127 /var/cache/bind/192.rev
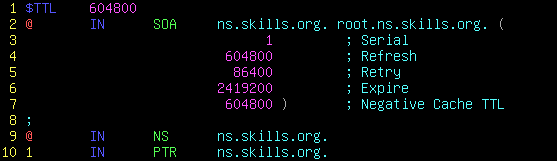
vim /var/cache/bind/192.rev
chown bind:bind -R /var/cache/bind/
systemctl restart bind9
DNS Master & Slave Service
1. DNS Master Server Settings
MasterServer (Linux)
apt install -y bind9
vim /etc/bind/named.conf
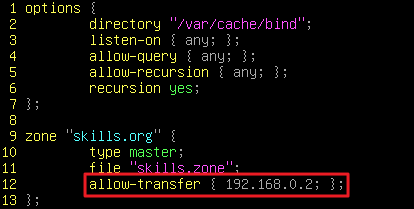
※ Slave DNS 서버로 사용할 서버 IP 주소를 적는다
cp /var/cache/bind/db.0 /var/cache/bind/skills.zone
vim /var/cache/bind/skills.zone

chown bind:bind -R /var/cache/bind/
systemctl restart bind9
2. DNS Slave Server Settings
SlaveServer (Linux)
apt install -y bind9
vim /etc/bind/named.conf
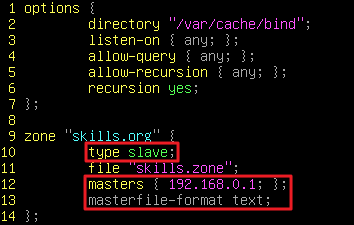
※ Master DNS 서버 IP 주소를 적는다
systemctl restart bind9
chown bind:bind -R /var/cache/bind/
ls -l /var/cache/bind/skills.zone

※ 위와 같이 zone 파일을 받아와야 한다
DNS Internal & External Zone
1. Internal and External Zone Settings
NameServer (Linux)
apt install -y bind9
vim /etc/bind/named.conf
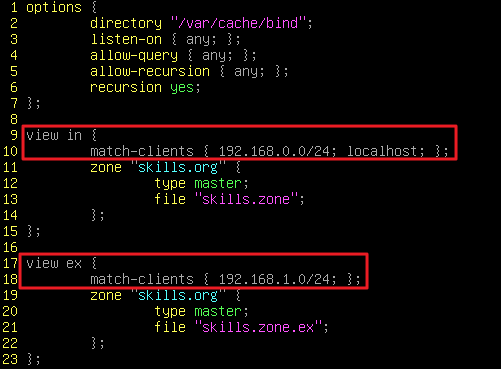
※ 외부 네트워크와 내부 네트워크에 허용할 네트워크를 입력하면 된다
systemctl restart bind9